Deployments
Prerequisites
- A connected Kubernetes Cluster.
- A configured Environment.
Creating an Application (Kubernetes Deployment)
-
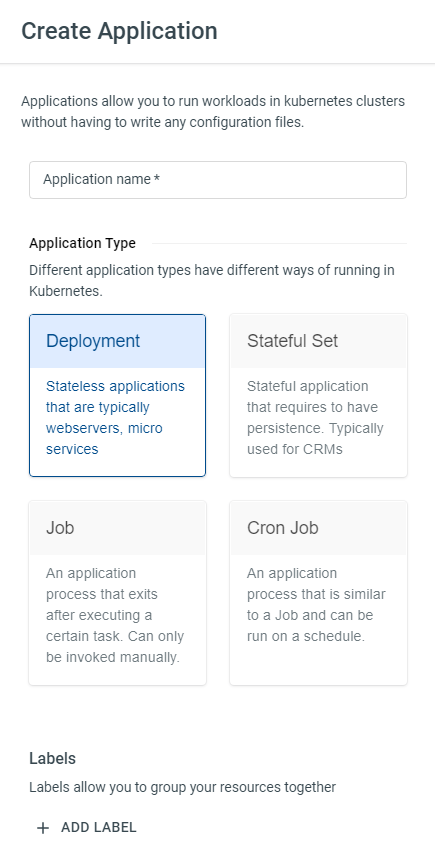
Navigate to Applications > Click the + CREATE button.
-
Give your Application a name and select Deployment as the Application Type. You can optionally add Labels to your application at this step (labels can always be added later). Proceed to the next step by clicking Save.
-
Click on the newly created application from the Application list.
-
You now need to configure an (existing) Environment for this Application. Click GET STARTED.
Best Practices
-
When you first create an application it’s recommended that you start with one of your “Development” Environments. (You may have given it a different name).
-
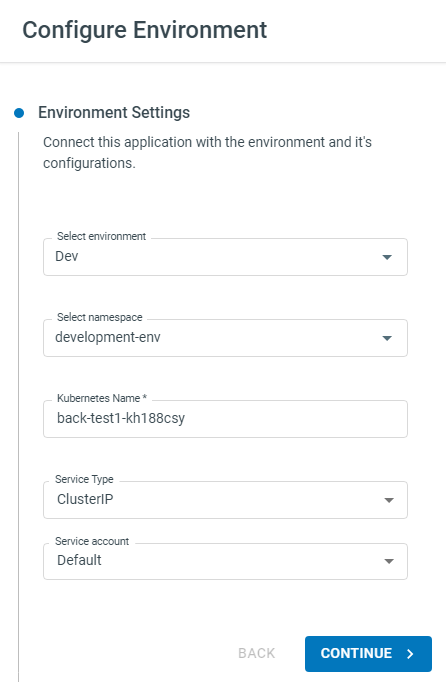
Select a namespace in the Environment. By default all Environments use a single namespace but you can choose to create namespace-per-application type of configurations. Read more about multi-namespace Environments
-
The Kubernetes Name will be name given to the underlying Deployment resource. Either leave the autogenerated value as is or edit it to your requirements. Note that the Kubernetes name cannot be changed later (without re-creating the Application).
-
Service Type - Leave as
ClusterIPby default unless you want a different/advanced configuration. UsingClusterIPwill allow us to use Ingresses to route traffic to multiple Applications using one Load Balancer/Ingress Controller.
-
-
Once you click CONTINUE you will be taken to the Deployment Settings.
Note
-
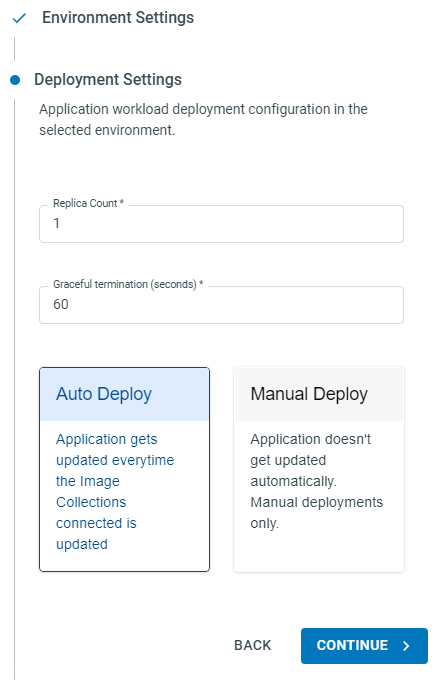
Replica Count - The initial number of replicas to run for this deployment. It’s easier to start with 1 replica and you can always configure scaling later.
-
Graceful termination - The number of seconds Kubernetes will wait before killing this container. Defaults to 1 minute (60s).
-
Deployment Type - Controls how your application will be updated when a new build/image is available.
- All Applications use one or more Image Collections to pull the Container Images. (We will set it up for this Application in the next step).
- With Auto Deploy, any new container images added to the Image Collection (via webhooks) will be immediately deployed to this Environment.
- With Manual Deploy the Image collection will be updated but the update will not be rolled out automatically. You will manually have to update the deployment through the Console. This is useful in scenarios where you need controlled releases, i.e. a Production release. You can manually deploy or promote images across different Environments.
- A typical scenario would be where you set up Auto Deployment to your development or staging Environments, and set your Production environment to Manual Deployment. You only promote a new build/image to production manually when you know everything is stable.
-
-
Click CONTINUE and you will be taken to the Node Selectors step. This is optional and can be configured later.
-
Click FINISH. Your Application will now be created. It may take a few seconds for everything to be created on your associated Clusters in the Environment.
-
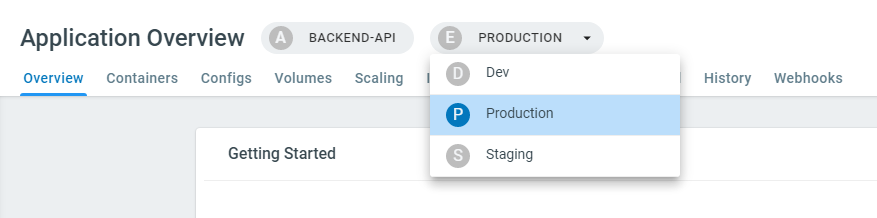
Switch to the Environment that you just configured using the drop down menu.
-
The next step is to add a Container to your application. Platformer Console allows you to configure deployment pipelines for multiple containers into single Kubernetes Pod if required. Click Create a Container in the Application > Overview.
Continued in Configuring Containers